I always wanted to make a decent controller for LED strips, so the most logical choice would be to get started with DMX. On this page I will describe this project of mine.
Step 1: design some PCB’s! Note that the final PCB will be 17*50mm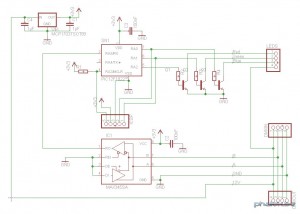

This morning the mailman delivered a cute box all the way from HongKong! My PCB’s arrived, and I was kind of surprised, see for yourself: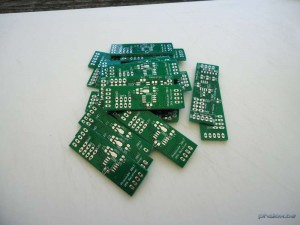
Just so you know: I ordered 10 of those, and i got 22! I even had 8 electrically checked. THANK YOU SEEEDSTUDIO!
These small boards look just great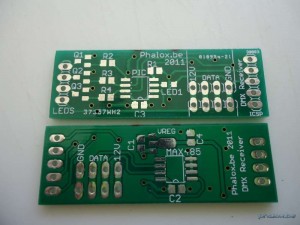
Not a single remark I can make concerning the quality! The only design flaw (but thats my fault) is an interruption in the ground plane because of a via.
I immediately soldered one of these boards as a testing setup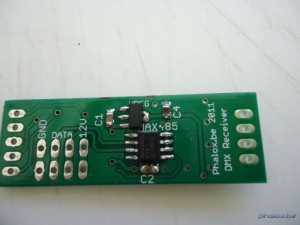

That is:
PIC12F1822
MAX3485
Microchip 3.3V regulator
BC847B
In the end it will be attached to a smaller piece of an RGB led strip, but for the moment I use it entirely.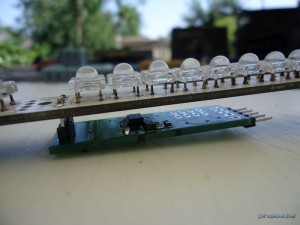

I finished developing the software for the micro controllers *jeej*!
I’m using Freestyler which is a Belgian freeware, so I’m happy to use it. I can control the three colours (Red, Green, Blue) of each strip separately via the (surprisingly easy) DMX protocol.
Enough Jibber Jabber; here are pics!

Each module is connected by a small pin header (12V, GND, D+ & D-)
DMX receiver module:

Power & terminating resistor module:

USB communication module (without the FTDI232RL breakout board):

I’ll try cleaning up the Assembly code, group schematic, PCB and BOM files and release it here for the public!
There are still ‘some’ PCBs left, so if you’re interested, send me an email (look on top of this website)
So you want to see some code, well here you have it!
In short: It’s in ASM, it uses software PWM (based on a timer interrupt) and the UART hardware firing interrupts.
I wouldn’t call it finished, but it’s in a working state 🙂 I hope comments explain the entire code, but I must admit that I have to reread my own code to figure out how I did it. If you have any questions, just post a reply (if the bots didn’t break it, otherwise just mail).
#include
	list p=12f1822, r=dec
;	errorlevel -306 ; no page boundary warnings
;	errorlevel -302 ; no bank 0 warnings
;	errorlevel -202 ; no 'argument out of range' warnings

; LED pin locations
#define PIN_R	0
#define PIN_G	2
#define PIN_B	1

; Defines starting conditions of pins
#define	DUTY_R	0x20
#define	DUTY_G	0xAA
#define	DUTY_B	0xFF

; Defines addresses
#define R_ADDR_LOW  0x07
#define R_ADDR_HIGH 0x00

; Defines addresses
#define G_ADDR_LOW  0x08
#define G_ADDR_HIGH 0x00

; Defines addresses
#define B_ADDR_LOW  0x09
#define B_ADDR_HIGH 0x00

; Defines end address (standard is 512)
#define TOTAL_ADDR_LOW  0x00
#define TOTAL_ADDR_HIGH 0x02

    __config _CONFIG1, (_FCMEN_OFF & _IESO_OFF & _CLKOUTEN_OFF & _BOREN_ON & _CPD_ON & _CP_OFF & _MCLRE_ON & _PWRTE_OFF & _WDTE_OFF & _FOSC_INTOSC) ; 0011 1111 1110 0100
    __config _CONFIG2, (_WRT_OFF & _PLLEN_OFF & _STVREN_ON & _BORV_19 & _LVP_OFF) ; 0001 1110 1111 1111

#define BREAK   0

    cblock 0x70
    teller
    duty_r
    temp_duty_r
    duty_g
    temp_duty_g
    duty_b
    temp_duty_b
    addr_low
    addr_high
    temprc
    stat
    endc

    org 0x000
    nop
    goto	init

    org 0x004
    ;---------------------------------------
    ; Interrupt handler
    ;---------------------------------------
    bcf	INTCON, GIE

    movlb   0
    btfsc   PIR1, RCIF
    goto    serialprocedure

    btfsc   INTCON, TMR0IF
    goto    timerprocedure

serialprocedure
    movlb	3
    ;btfsc       RCSTA, FERR     ; Test for framing error
    ;retfie  ; This is the start sequence

    btfss       RCSTA, FERR     ; Test for framing error
    goto        testandinc
    movf        RCREG, W        ; Mark register as read
    bsf         stat, BREAK     ; Break has passed, set bit
    movlw       0xFE
    movwf       TXREG
    retfie

testandinc
    btfss       stat, BREAK     ; Test if break has happened
    goto        serialinc       ; We're past the start sequence

    ; This is the start byte
    movf        RCREG, W        ; Mark register as read
    bcf         stat, BREAK     ; Clear break bit
    retfie

serialinc
    ; Increment counter
    incf        addr_low, F     ; Increment the Low byte
    btfsc       STATUS, Z       ; Do we have Zero (Multiple of 256)?
    incf        addr_high, F    ; Increment High byte (if necessary)

    movf        RCREG, W        ; Move RCREG in a private variable
    movwf       temprc

    call        debugger

testRedAddress
    movlw	R_ADDR_LOW
    subwf	addr_low, W 	; substract values
    btfss	STATUS, Z 	; if zero detected, skip
    goto        testGreenAddress
    movlw	R_ADDR_HIGH
    subwf	addr_high, W 	; substract values
    btfss	STATUS, Z 	; if zero detected, skip
    goto        testGreenAddress
    ; If this is reached, address is the same
    movf        temprc, W
    movwf       temp_duty_r

testGreenAddress
    movlw	G_ADDR_LOW
    subwf	addr_low, W 	; substract values
    btfss	STATUS, Z 	; if zero detected, skip
    goto        testBlueAddress
    movlw	G_ADDR_HIGH
    subwf	addr_high, W 	; substract values
    btfss	STATUS, Z 	; if zero detected, skip
    goto        testBlueAddress
    ; If this is reached, address is the same
    movf        temprc, W
    movwf       temp_duty_g

testBlueAddress
    movlw	B_ADDR_LOW
    subwf	addr_low, W 	; substract values
    btfss	STATUS, Z 	; if zero detected, skip
    goto        testReset
    movlw	B_ADDR_HIGH
    subwf	addr_high, W 	; substract values
    btfss	STATUS, Z 	; if zero detected, skip
    goto        testReset
    ; If this is reached, address is the same
    movf        temprc, W
    movwf       temp_duty_b

testReset

    movlw	TOTAL_ADDR_LOW
    subwf	addr_low, W 	; substract values
    btfss	STATUS, Z 	; if zero detected, skip
    retfie
    movlw	TOTAL_ADDR_HIGH
    subwf	addr_high, W 	; substract values
    btfss	STATUS, Z 	; if zero detected, skip
    retfie

    ; Address counter has reached maximum
    clrf        addr_low
    clrf        addr_high
    retfie

timerprocedure
    bcf         INTCON, TMR0IF
    incfsz	teller
    goto	int_test

    ; End of period:
    ; Setting new duty cycles
    movf    temp_duty_r, W
    movwf   duty_r
    movf    temp_duty_g, W
    movwf   duty_g
    movf    temp_duty_b, W
    movwf   duty_b

    ; Setting LEDs
    movlb	2
    movf    duty_r, W
    bcf     LATA, PIN_R ; Turn off first
    btfss   STATUS, Z
    bsf     LATA, PIN_R	; turn on led

    movf    duty_g, W
    bcf     LATA, PIN_G ; Turn off first
    btfss   STATUS, Z
    bsf     LATA, PIN_G	; turn on led

    movf    duty_b, W
    bcf     LATA, PIN_B ; Turn off first
    btfss   STATUS, Z
    bsf     LATA, PIN_B	; turn on led
    retfie              ; Go back!

int_test
    movlb	2

    ; Test Red duty
    movf	duty_r, W 	; put duty in W
    subwf	teller, W 	; substract values
    btfsc	STATUS, Z 	; if zero detected, execute
    bcf         LATA, PIN_R	; turn off led

    ; Test Green duty
    movf	duty_g, W 	; put duty in W
    subwf	teller, W 	; substract values
    btfsc	STATUS, Z 	; if zero detected, execute
    bcf         LATA, PIN_G	; turn off led

    ; Test Blue duty
    movf	duty_b, W 	; put duty in W
    subwf	teller, W 	; substract values
    btfsc	STATUS, Z 	; if zero detected, execute
    bcf         LATA, PIN_B	; turn off led

    retfie				; and return from interrupt
    ;---------------------------------------

init

    movlw	0x00
    movwf	teller		; Reset teller

    movlw	DUTY_R
    movwf	duty_r		; Load duty cycle
    movwf       temp_duty_r

    movlw	DUTY_G
    movwf	duty_g		; Load duty cycle
    movwf       temp_duty_g

    movlw	DUTY_B
    movwf	duty_b		; Load duty cycle
    movwf       temp_duty_b

    clrf        addr_low
    clrf        addr_high

    ; Set clock speed
    ;movlw	b'10100111' ; Internal clock at 62.5kHz
    movlw	b'01111011' ; Internal clock at 16Mhz
    movlb	1
    movwf	OSCCON

    movlb	3
    clrf	ANSELA 		; All pins digital

    movlb	1
    clrf	ADCON0 		; Disable ADC
    clrf        ADCON1 		; Digital I/O
    clrf	TRISA 		; All pins output
    bsf         TRISA, 5        ; RA5 is input

    movlb	2
;    clrf	LATA 		; turn off all LEDs
    clrf	CM1CON0 	; Disable comparator
    clrf        CM1CON1         ;

;    bsf         LATA, 5

    bsf     APFCON, RXDTSEL ; Set RX to RA5
    bsf     APFCON, TXCKSEL ; Set TX to RA4

    movlb	3

    bsf     BAUDCON, BRG16	; 16 bit baud generator
    bsf     TXSTA, BRGH     ; Set High baud rate

    ; Place 15 in SPBRG
    movlw	0x0F
    movwf	SPBRGL
    clrf	SPBRGH

    movlb   1

    bsf     PIE1, RCIE      ; Enable receive intterrupt
    bcf     PIE1, TXIE      ; Disable transmit interrupts

    movlb   3
    bsf     TXSTA, TXEN     ; Enable transmit
    bsf     RCSTA, RX9      ; 9 bit reading
    bsf     RCSTA, SPEN     ; Enables serial port
    bsf     RCSTA, CREN
    bcf     TXSTA, SYNC     ; Asynch mode

    movlb   1
    bcf     OPTION_REG, TMR0CS 	; Timer op Fosc/4
    bsf     OPTION_REG, PSA 	; DISABLE prescaler
    bcf     OPTION_REG, PS0 	; Set timer prescaler to 1:2
    bcf     OPTION_REG, PS1
    bcf     OPTION_REG, PS2

    bsf     INTCON, PEIE    ; Perpheral interrupts enabled
    bsf     INTCON, TMR0IE  ; Enable timer0 overflow interrupt
    bsf     INTCON, GIE     ; Interrupts on!
main
    nop
    goto	main

debugger
    movlb       3
    movf        addr_high, W
    movwf       TXREG
    movf        addr_low, W
    movwf       TXREG
    return

    end
If you might want to have these boards made by a PCB service (or make it yourself!), here are the files.
What’s in the archive?
* Eagle schematic and board files
* 2 libraries I made
* Gerber files for services like seeedstudio
Note to self: C1 is 1µF and C2 is 100nF
Have fun!
Last week we put the lights to the test for a small party. Because 3 little (9 LED) LED strips is a little lousy for a party, I made some more: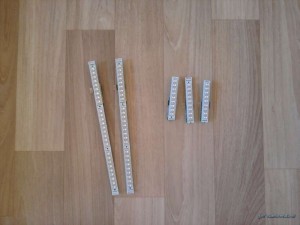
Two full size LED strips were also driven by the tiny DMX receiver boards, so they are capable of something.
Putting all of those strips next to each other is also quite stupid, so I also made 5 extension cables (in total 10m in length):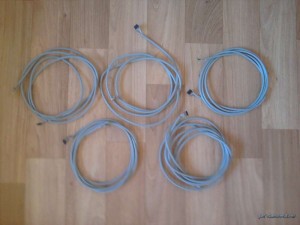
Here is an updated version of the firmware.
Changes:
* Added a ‘reset counter by break’ feature, so that less than 512 bytes could be received without breaking anything
* Increased PWM frequency to reduce flickering (with my LED strips, flickering is not visible any more)
Note: I think they are more or less DMX-512 compliant. I’d say they are more forgiving than the strict standard. But, if there are transmission errors in the data packages, a break will be detected and the entire set will be lost or even ‘sent’ to the wrong devices. Just so you know!
#include <p12F1822.inc>
    list p=12f1822, r=dec
;   errorlevel -306 ; no page boundary warnings
;   errorlevel -302 ; no bank 0 warnings
;   errorlevel -202 ; no 'argument out of range' warnings

; Defines addresses
#define R_ADDR_LOW  0x01
#define R_ADDR_HIGH 0x00

; Defines addresses
#define G_ADDR_LOW  0x02
#define G_ADDR_HIGH 0x00

; Defines addresses
#define B_ADDR_LOW  0x03
#define B_ADDR_HIGH 0x00

; Defines starting conditions of pins (useful when no DMX signal is applied)
#define	DUTY_R	0x20
#define	DUTY_G	0xAA
#define	DUTY_B	0xFF

; LED pin locations
#define PIN_R	1
#define PIN_G	2
#define PIN_B	0

; Defines end address (standard is 512)
; The counter is also reset by the break signal, this is an extra check.
; If you want to abuse the DMX-512 protocol (by using more than 512 values),
; Change it here
#define TOTAL_ADDR_LOW  0x00
#define TOTAL_ADDR_HIGH 0x02

; Timer preload that generates timebase for PWM
; This value reduces flickering
#define TIMER_LOAD 0xD0

    __config _CONFIG1, (_FCMEN_OFF & _IESO_OFF & _CLKOUTEN_OFF & _BOREN_ON & _CPD_OFF & _CP_OFF & _MCLRE_ON & _PWRTE_OFF & _WDTE_OFF & _FOSC_INTOSC) ; 0011 1111 1110 0100
    __config _CONFIG2, (_WRT_OFF & _PLLEN_OFF & _STVREN_ON & _BORV_19 & _LVP_OFF) ; 0001 1110 1111 1111

#define BREAK   0

    cblock 0x70
    cntr        ; 8 bit duty cycle counter
    duty_r
    temp_duty_r
    duty_g
    temp_duty_g
    duty_b
    temp_duty_b
    addr_low    ; Current lower address
    addr_high   ; Current higher address
    temprc      ; Temporary received value
    stat        ; Status register
    endc

    org 0x000
    nop
    goto	init

    org 0x004
    ;---------------------------------------
    ; Interrupt handler
    ;---------------------------------------
    bcf	INTCON, GIE

    movlb   0
    btfsc   PIR1, RCIF
    goto    serialprocedure

    btfsc   INTCON, TMR0IF
    goto    timerprocedure

serialprocedure
    movlb	3

    btfss       RCSTA, FERR     ; Test for framing error
    goto        testandinc

    ; A break (or part of the break) has been detected
    movf        RCREG, W        ; Mark register as read
    bsf         stat, BREAK     ; Break has passed, set bit
    movlw       0xFE
    movwf       TXREG
    clrf        addr_low        ; Clear counters
    clrf        addr_high
    retfie

testandinc
    btfss       stat, BREAK     ; Test if break has happened
    goto        serialinc       ; We're past the start sequence

    ; This is the start byte, we don't care about it
    movf        RCREG, W        ; Mark register as read
    bcf         stat, BREAK     ; Clear break bit
    retfie

serialinc
    ; Increment counter
    incf        addr_low, F     ; Increment the Low byte
    btfsc       STATUS, Z       ; Do we have Zero (Multiple of 256)?
    incf        addr_high, F    ; Increment High byte (if necessary)

    movf        RCREG, W        ; Move RCREG in a another variable
    movwf       temprc

    call        debugger

testRedAddress
    movlw	R_ADDR_LOW
    subwf	addr_low, W 	; substract values
    btfss	STATUS, Z 	; if zero detected, skip
    goto        testGreenAddress
    movlw	R_ADDR_HIGH
    subwf	addr_high, W 	; substract values
    btfss	STATUS, Z 	; if zero detected, skip
    goto        testGreenAddress
    ; If this is reached, address is the same
    movf        temprc, W
    movwf       temp_duty_r

testGreenAddress
    movlw	G_ADDR_LOW
    subwf	addr_low, W 	; substract values
    btfss	STATUS, Z 	; if zero detected, skip
    goto        testBlueAddress
    movlw	G_ADDR_HIGH
    subwf	addr_high, W 	; substract values
    btfss	STATUS, Z 	; if zero detected, skip
    goto        testBlueAddress
    ; If this is reached, address is the same
    movf        temprc, W
    movwf       temp_duty_g

testBlueAddress
    movlw	B_ADDR_LOW
    subwf	addr_low, W 	; substract values
    btfss	STATUS, Z 	; if zero detected, skip
    goto        testReset
    movlw	B_ADDR_HIGH
    subwf	addr_high, W 	; substract values
    btfss	STATUS, Z 	; if zero detected, skip
    goto        testReset
    ; If this is reached, address is the same
    movf        temprc, W
    movwf       temp_duty_b

testReset

    movlw	TOTAL_ADDR_LOW
    subwf	addr_low, W 	; substract values
    btfss	STATUS, Z 	; if zero detected, skip
    retfie
    movlw	TOTAL_ADDR_HIGH
    subwf	addr_high, W 	; substract values
    btfss	STATUS, Z 	; if zero detected, skip
    retfie

    ; Address counter has reached maximum
    ; This assures compliance with DMX-512 protocol
    clrf        addr_low        ; Reset counters
    clrf        addr_high
    retfie

timerprocedure
    bcf     INTCON, TMR0IF

    ; Preloading timer value
    movf    TIMER_LOAD, W
    movwf   TMR0

    incfsz  cntr
    goto    int_test

    ; End of period, setting new duty cycles
    movf    temp_duty_r, W
    movwf   duty_r
    movf    temp_duty_g, W
    movwf   duty_g
    movf    temp_duty_b, W
    movwf   duty_b

    ; Setting LEDs
    movlb	2
    movf    duty_r, W
    bcf     LATA, PIN_R ; Turn off first
    btfss   STATUS, Z
    bsf     LATA, PIN_R	; turn on led

    movf    duty_g, W
    bcf     LATA, PIN_G ; Turn off first
    btfss   STATUS, Z
    bsf     LATA, PIN_G	; turn on led

    movf    duty_b, W
    bcf     LATA, PIN_B ; Turn off first
    btfss   STATUS, Z
    bsf     LATA, PIN_B	; turn on led
    retfie

int_test
    movlb	2

    ; Test Red duty
    movf	duty_r, W 	; put duty in W
    subwf	cntr, W 	; substract values
    btfsc	STATUS, Z 	; if zero detected, execute
    bcf         LATA, PIN_R	; turn off led

    ; Test Green duty
    movf	duty_g, W 	; put duty in W
    subwf	cntr, W 	; substract values
    btfsc	STATUS, Z 	; if zero detected, execute
    bcf         LATA, PIN_G	; turn off led

    ; Test Blue duty
    movf	duty_b, W 	; put duty in W
    subwf	cntr, W 	; substract values
    btfsc	STATUS, Z 	; if zero detected, execute
    bcf         LATA, PIN_B	; turn off led

    retfie                      ; and return from interrupt

    ;--------------------------------------------
    ; This is the intialisation and main routine
    ;--------------------------------------------

init

    movlw	0x00
    movwf	cntr		; Reset counter

    movlw	DUTY_R
    movwf	duty_r		; Load duty cycle
    movwf       temp_duty_r

    movlw	DUTY_G
    movwf	duty_g		; Load duty cycle
    movwf       temp_duty_g

    movlw	DUTY_B
    movwf	duty_b		; Load duty cycle
    movwf       temp_duty_b

    clrf        addr_low
    clrf        addr_high

    ; Set clock speed
    movlw	b'01111011'     ; Internal clock at 16Mhz
    movlb	1
    movwf	OSCCON

    movlb	3
    clrf	ANSELA 		; All pins digital

    movlb	1
    clrf	ADCON0 		; Disable ADC
    clrf        ADCON1 		; Digital I/O
    clrf	TRISA 		; All pins output
    bsf         TRISA, 5        ; RA5 is input (UART)

    movlb	2
    clrf	CM1CON0 	; Disable comparator
    clrf        CM1CON1

    bsf     APFCON, RXDTSEL     ; Set RX to RA5
    bsf     APFCON, TXCKSEL     ; Set TX to RA4, only used for debugging purposes

    movlb	3

    ; Configure UART module
    bsf     BAUDCON, BRG16	; 16 bit baud generator
    bsf     TXSTA, BRGH         ; Set High baud rate

    movlw   0x0F                ; Place 15 in SPBRG<0:15>
    movwf   SPBRGL
    clrf    SPBRGH

    movlb   1

    bsf     PIE1, RCIE      ; Enable receive intterrupt
    bcf     PIE1, TXIE      ; Disable transmit interrupts

    movlb   3
    bsf     TXSTA, TXEN     ; Enable transmit
    bsf     RCSTA, RX9      ; 9 bit reading
    bsf     RCSTA, SPEN     ; Enables serial port
    bsf     RCSTA, CREN
    bcf     TXSTA, SYNC     ; Asynch mode

    ; Configure Timer0 module
    movlb   1
    bcf     OPTION_REG, TMR0CS 	; Timer op Fosc/4
    bsf     OPTION_REG, PSA 	; DISABLE prescaler
    bcf     OPTION_REG, PS0 	; Set timer prescaler to 1:2
    bcf     OPTION_REG, PS1
    bcf     OPTION_REG, PS2

    bsf     INTCON, PEIE    ; Perpheral interrupts enabled
    bsf     INTCON, TMR0IE  ; Enable timer0 overflow interrupt
    bsf     INTCON, GIE     ; Interrupts on!

main
    nop
    goto    main

; Writes the current counter values to the transmit UART
debugger
    movlb   3
    movf    addr_high, W
    movwf   TXREG
    movf    addr_low, W
    movwf   TXREG
    return

    end
This is the result:
https://www.youtube.com/watch?v=7OesQ3aEstE
The flicker you see in the center frame, is because the set value for the LEDs is not full brightness, and therefore it’s using PWM to change the intensity. It’s that flicker frequency that can still be detected by the camera, but no longer by the human eye

How do you set dmx start addres.
I assume that you mean the address for a device (or LED color)?
Check the source code. At lines 7 through 17, you’ll find the defines for the three colors. You simply ‘glue’ the low and high byte together, and then you know the address. So, they’re actually hard-coded. There are no switches to quickly change them.
Hey, cool project !
I was asking myself what site/service you used to make your pcb. For small quantity i only know eurocircuit and pcbpool but is it cheaper to do that in hong kong ?
Welcome here! Nice to see some more Belgian people 🙂
I have been using the PCB service from SeeedStudio in China. There is also iTeadStudio that delivers the same quality. They tend to compete with each other!
Have fun! If you have any more questions, I’d love to hear them!
Thanks for your quick answer ! I can really see the point of doing those in china. I wonder how they do benefits which such low prices… Anyway, i’ll browse your site when time will be mine. I need to study right now but i’ve many projects in my head waiting to be done ! (including an 8 channels adressable dmx receiver) & Any answers to my questions would be appreciated of course !
Good luck with exams 🙂
This is my first year after my studies, meaning that I’m working!
Write your ideas down, it helps clearing your mind of them and you won’t forget them 😉
what about the USB Connectivity module details it isn’t given anywhere 🙁 i need it to make the USB Connectivity and also is it possible to connect multiple DMX Receiver with the help of IN n OUT DMX Pins
You’ve got a point, I never really discussed that.
In fact it’s quite simple: I am using a USB to UART converter board (the black one). Mine contains a FT232RL chip. You can find these kinds of boards on multiple places (check ebay!).
Next, we need to make a RS485 signal. The only difference with UART, is that this is a differential signal (one line is high, the other is low and vice versa) and it works on different voltages.
I am using a MAX485 (but there are cheaper version not from Maxim). This is actually a transceiver (can transmit and receive, but not at the same time), but I am using it as a transmitter only (DMX is one way traffic!). Have a look at the datasheet of this chip: http://www.usconverters.com/downloads/max491.pdf
For transmission function, you have to connect:
* /RE to 5V -> this DISABLES receive
* DE to 5V -> this ENABLES transmit
* RO can be left open. I think you can also connect to GND
* DI is the input of the chip
* Power stuff, can simply be powered by the 5V and GND coming from the FT232RL board.
Connect the TX line of the FT232RL to DI of MAX485, the A and B output of the MAX 485 are your DMX signal. Make sure you don’t swap them, because then all your information is inverted!
PS: you can also find USB->DMX modules on Ebay, but I don’t know how they work…
Your last question: Yes! DMX is a bus, so you can attach as many modules as you want (as long as your bus can handle it, and you don’t cross the 512 limit). Normally they connect a lot less nodes per bus.
Hi. I am interesting dmx 3ch rec. but I can’t convert hex file. PLease help me. Usually I am writing program with picbasicpro. Now your program asm. program. how can I build this. I downloaded mplab software. But give to me more error. I think 12lf1822.lib can’t see. Please share with me your experience. I writen dmx sender with pbp it is working good. But I can’t write receiver program. I think pbp commands take a very long time. start pulse sometimes lost. I want to try your program. Please help. Thanks
Nice little circuit 🙂
I wonder if you have considered adding gamma-correction for the LEDs (see https://learn.adafruit.com/led-tricks-gamma-correction/the-quick-fix).. I am no expert i PIC assembler myself, but I would consider it to be possible to implement with a reasonable knowledge about the PIC assembler syntax.
Thanks! I did however learn, that if you’re using it in “production” (a party or something), you really need better isolation (preferably on the DMX transmitter side) to work stable. Also, XLR connectors would be nice to have. Those pin headers are dead in no time!
I did not actually do any gamma correction, but should be possible! The 12F1822 (http://ww1.microchip.com/downloads/en/DeviceDoc/40001413E.pdf) has 256 bytes of data memory (eeprom) which could be used for this (that’s a bit of a waste though. Or somewhere in its 2k of flash. Having fun with banks is somewhat annoying on these tiny chips, so then the EEPROM memory doesn’t sound too bad 🙂
Many ways to achieve the result. If you feel like it, please take my code and dive into! the 12F pics you can sample for free at Mchip! I’ve just moved abroad and had to leave my electronics stuff at home 🙁
[…] did DMX receivers, we did DMX pool lights, but now it’s time for something slightly more professional: Buying […]